Site is being updated however please start here for these esp8266 builds.
Hopefully this page will show you how to build the OTG AirWhere system for use with USB.
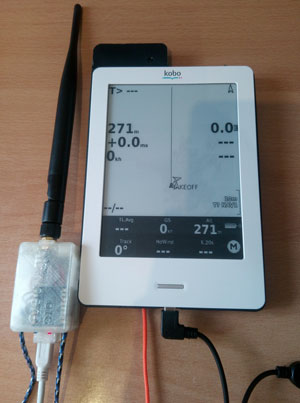
If you already have a Kobo as a flight computer and dont want to rebuild or you have bought a prebuilt one, this page will show you how to add AirWhere easily and cheaply. ( around £30 ). Picture below shows a prebuilt GoFly AirWhere unit with USB AirWhere.
|
Click on the image to enlarge
|
|
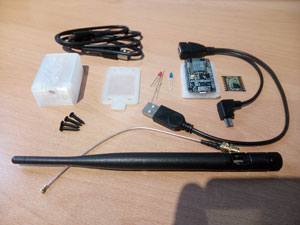
Firstly you will need to purchase the components - a picture of these is shown below. We can help with the cheapest places to get these or we can supply a kit for you - and if you really dont want to have a go at building one then we can supply a ready built version to just plug in and go !
|
Click on the image to enlarge
|
Parts Needed are ( if you cant get any contact us for them ):-
ESP8266 - AMICA Version - the Lolin version doesnt work aswell.
RF Lora Board
Micro USB Cable
Micro USB OTG Cable ( we have just found a nice one with right angled plug on it to connect to Kobo )
2 LEDS
2 330 OHM resistors
AirWhere Case
Screws for case
SMA Pigtail
Antenna
Also some wire and heatshink - and thats basically it!
The whole process from start to finish should take about an hour, maybe 90 mins if your taking it slowly.
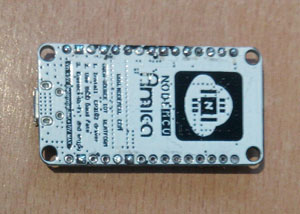
Firstly, remove the pins off the Nodemcu board, you can do this by first cutting the pin down to the plastic, then using a pair of cutters, pull the plastic off, careful not to damage the board.
Then use a pair of pliers to hold the pin, and apply a soldering iron to the reverse of the board, wait for the solder to melt and pull the pin out, the entire board should take 5 mins. Then clean up each pin hole with some solder, do take care there is no solder jumping the pins or any fine wire. The main problems when making an AirWhere unit is the pins being shorted out to another pin, this will stop the board working.
|
Click on the image to enlarge
|
|
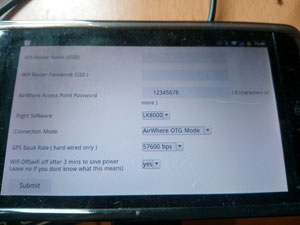
Now flash the board as per the instructions in the build pages with the AirWhere software, then connect your phone to the AirWhere webpage and configure for OTG and baud rate of 57600. If you have a phone that doesnt connect or wont load the webpages, just try another one, there can be some issues with some phones, but most work fine. If you set wifi Off to yes - this will leave the wifi on for 3 mins when the unit starts up and then drop the wifi after that to lower power consumption.
|
Click on the image to enlarge
|
|
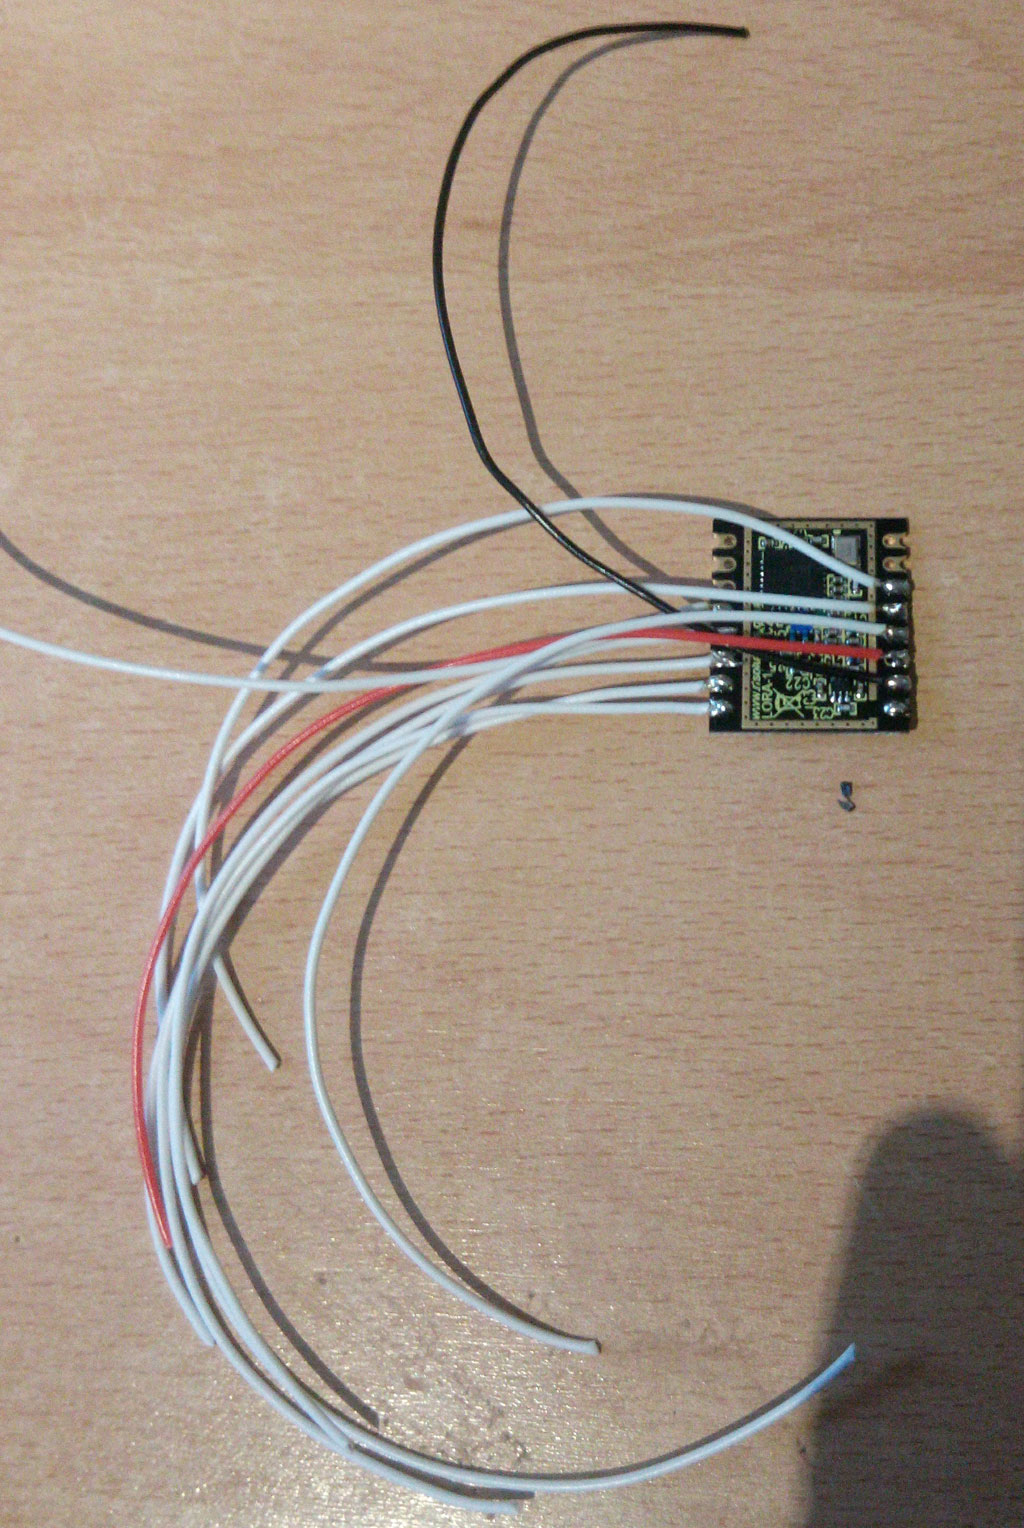
Next solder on some wires to the RF Lora board, about 3 inches of wire, use coloured wire if you can do, to help later, but one colour is ok.
|

Click on the image to enlarge
|
|
Cut down the SMA Pigtail as per the photo - look at later photos to see how it fits, cut to length after measuring.
| |

Click on the image to enlarge
|
|
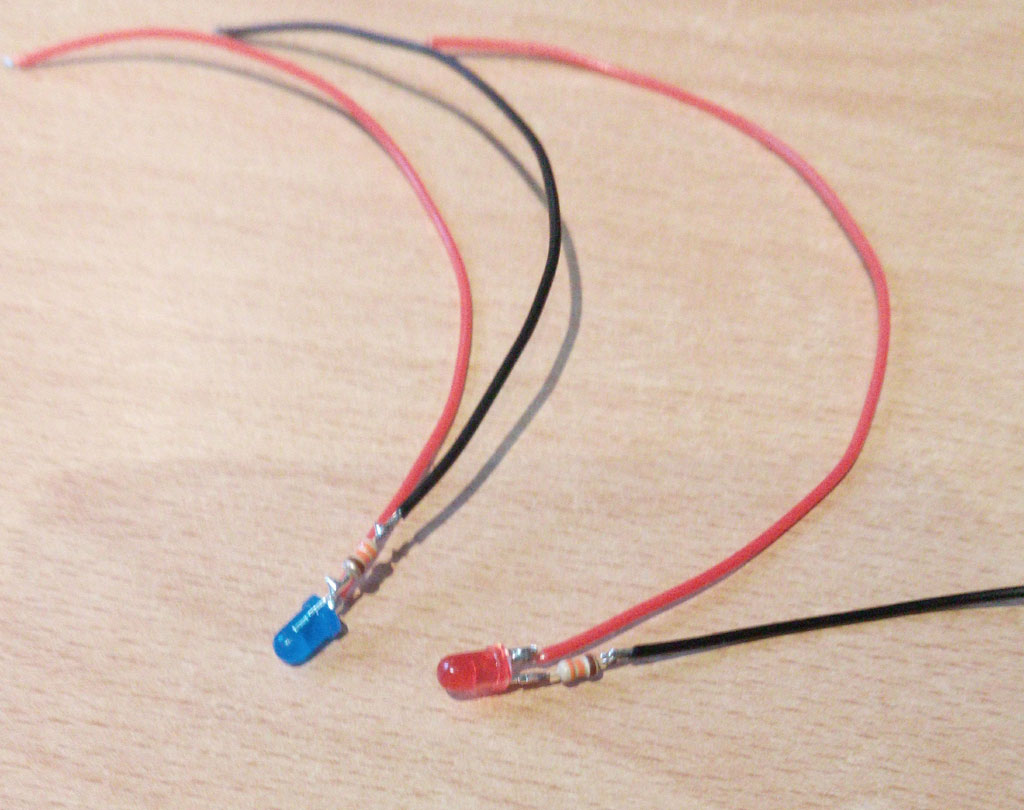
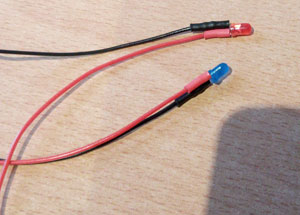
And add a resistor to the short leg of the LEDS. You can test these by applying 3 volts - use a button cell, the light should light up with the resistor attached.
| |

Click on the image to enlarge
|
|
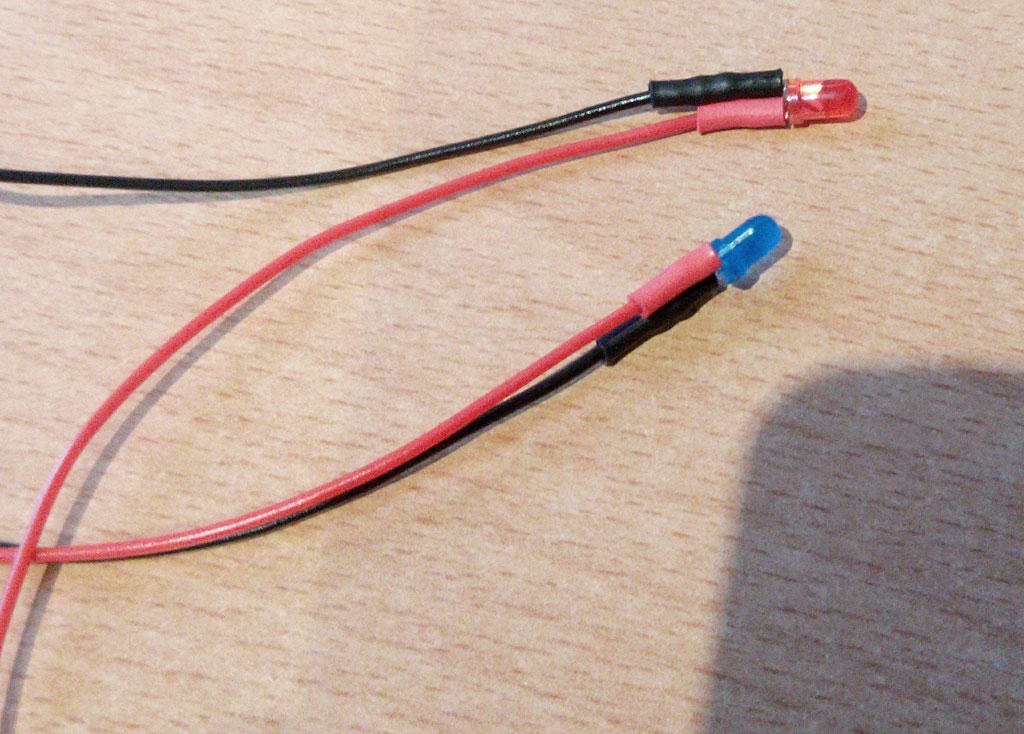
Then add some heatshrink to the base of the leds as below:-
| |
Click on the image to enlarge
|
|
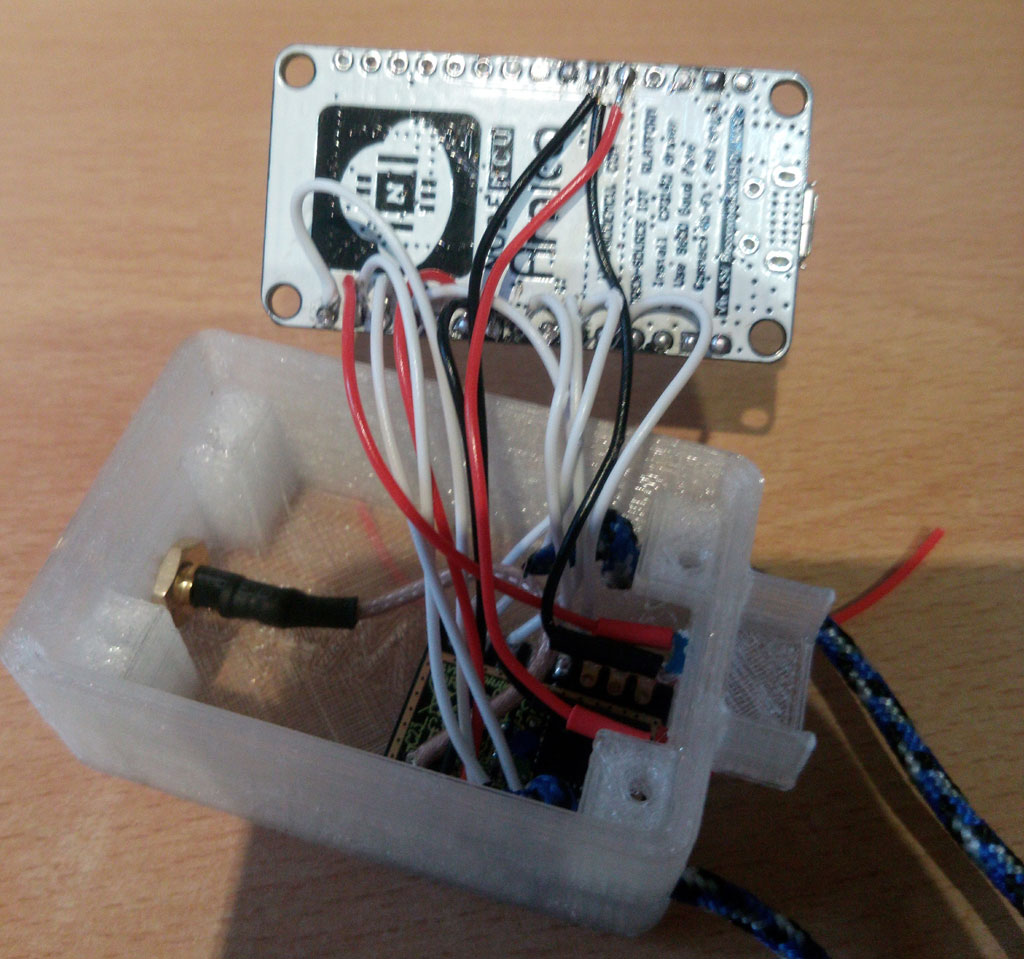
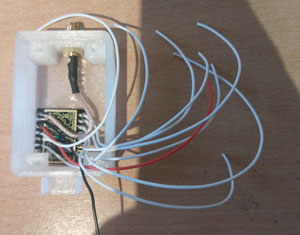
Take the rf lora board with the wires attached and lower it into the case, use some double sided tape to hold in place. You can solder on the sma pigtail before you put it in the case if this is easier, push the sma pigtail into position and add the nut to secure in place. If you have a volt meter, check theres no short between the inner and ground on the pigtail - if there is the board wont boot.
| |
Click on the image to enlarge
|
|
Then add the leds into the case, quite a few wires in there now but dont worry just make sure you know where each go and onto the next part.
|

Click on the image to enlarge
|
Now this is the only difficult part, you need to solder on the RF wires to the Nodemcu board, be careful they connect to the correct place and there is no solder or wires jumping. If it does work later the problem will most probably be here and its wise just to remove the wires and check its ok before refitting, you can also check for any of the pins jumping with a volt meter.
Follow the diagram on the wifi page here.
Also at this point add a lanyard into the case for flight deck security.
|

Click on the image to enlarge
|
You are now in a position to check your wiring works. Plug the board into a micro usb lead attached to your pc and then download and run putty. There is lots of information on this page how to do this :- Diagnostic page . Hopefully after checking some soldering joints and making sure the wires are to the same place you should be seeing the words "RF Lora - Attached" in putty. The wiring and setup is now correct.
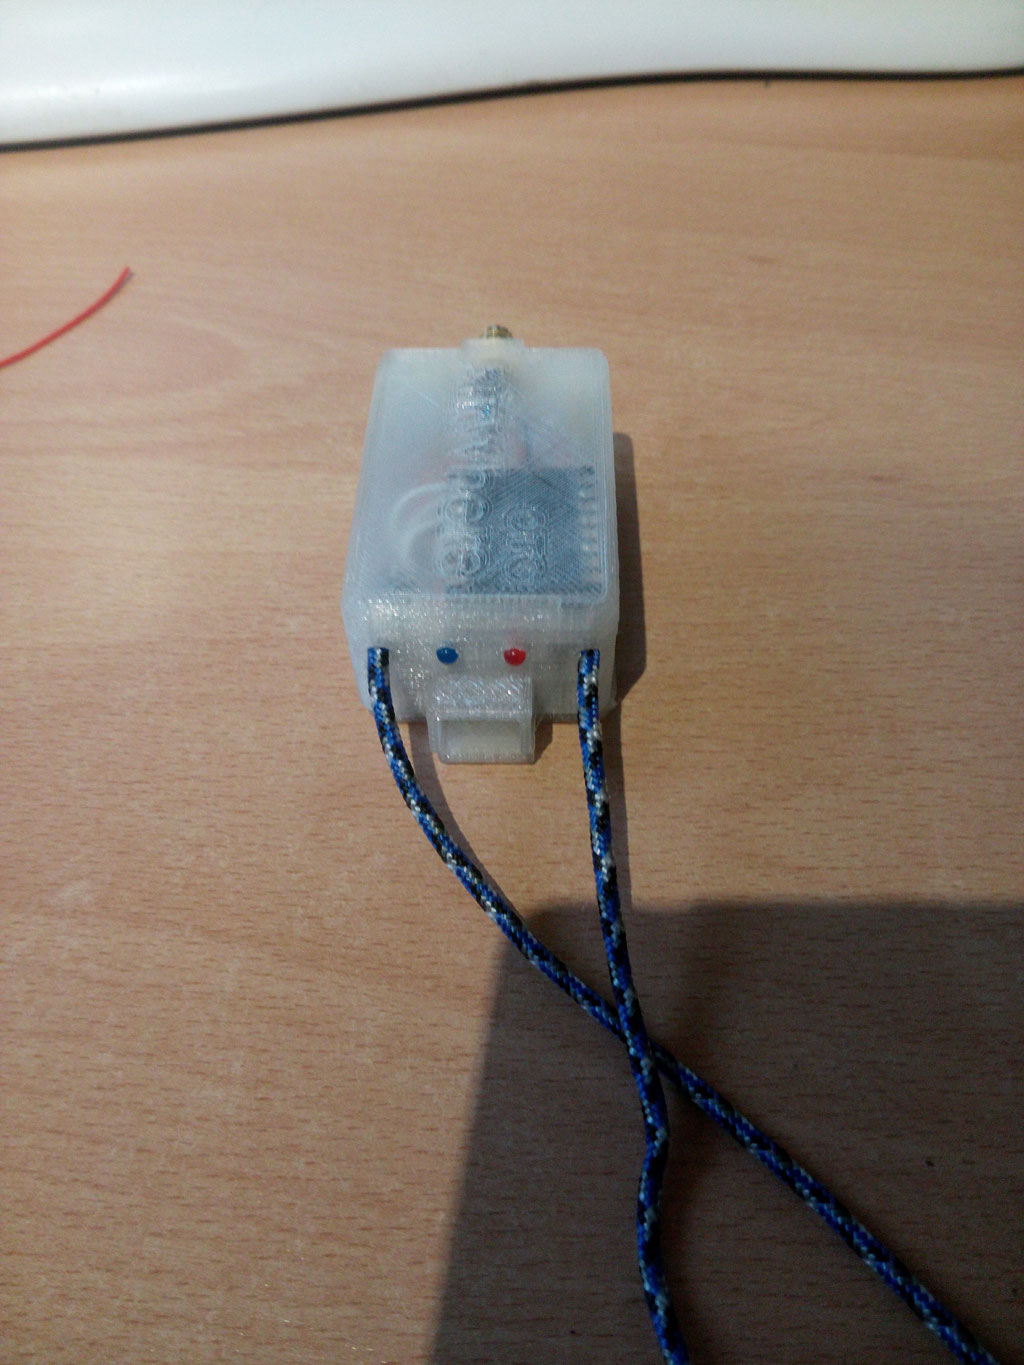
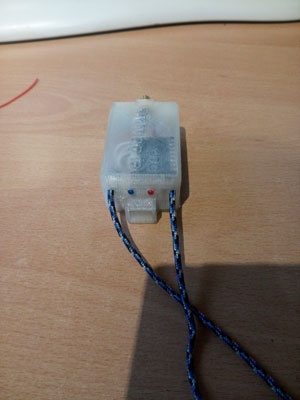
Add the base of the box and screw in place, your building is done.
|
Click on the image to enlarge
|
To attach to your Kobo, you need to use an OTG lead. One half goes into the Kobo and one into the AirWhere unit, then plug the male use into a power supply and your kobo will be charging and the airwhere power LED should come on.
You now need to install the USB Host mode version of LK8000, either visit the download page on here and download the dual boot version, switch on and switch to OTG mode, or just install the LK8000 USB version.
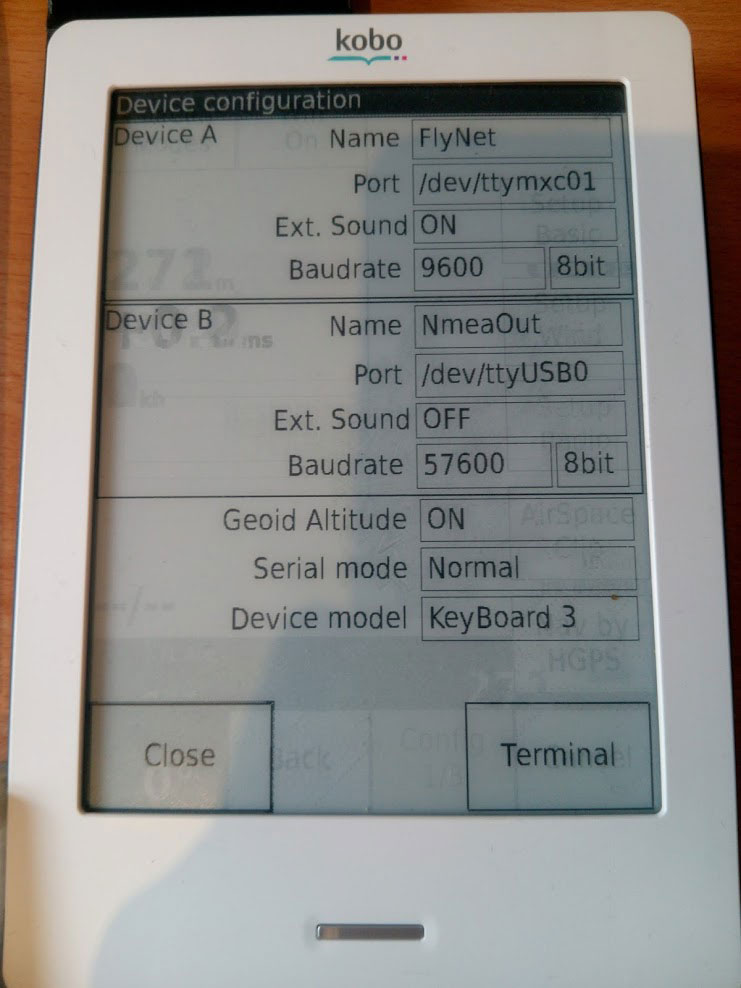
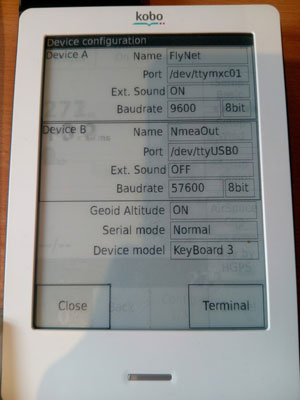
You then need to add device B in LK8000 as below, leave device A as it was, this is your onboard GPS.
This procedure needs to be done with a functioning AirWhere unit attached to the Kobo.
|
Click on the image to enlarge
|
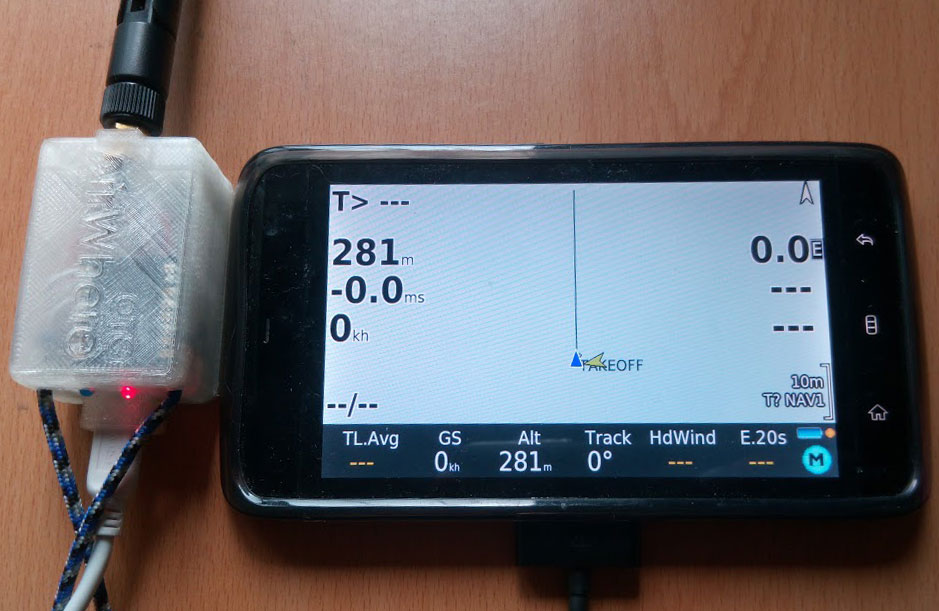
This should all work now, your comm port should reset in LK8000 and the detect the airwhere unit - please use the facebook page or contact us for any problems.
This unit is also the same for the ground station and WiFi version for connection to Kobo and any wifi enabled phone with XCSoar / LK8000 on them. To switch to run on an android or kobo on wifi just follow the instructions on this page :-
Installing WiFi AirWhere - wifi works ok, but its not as good as the wired or usb version. You can easily connect a BLE module to the system and this is 100% reliable and works with less power than Wifi, the BLE modules are about £3 - contact us for more details.
Hopefully soon we will have the esp32 working with native bluetooth so you will just have to build a unit as above and switch BLE on in the config and it will all just automagically work.
|
Click on the image to enlarge

Click on the image to enlarge
|
Notes
If while running the blue transmission light comes on and stays on the reason for this could be :-
1. Antenna pigtail shorted out.
2. Pins D0 and D2 swapped over incorrectly - check wiring
3. Any pins on the ESP or the RF board shorted out - check all pins .
|